Friday, May 4, 2018

Brin's Mesa/Solider Pass Loop and Soldier Pass Arch

If you are in Sedona and want a great hike that captures the beauty of the area then do this hike!  This is a five mile loop hike.  If you add the side trail to the arch you will be adding an additional 1/2 mile to your hike. Trust me you want to do the side trail to the arch.  This is one of the most unique arches I have ever seen in all my years of hiking and exploring.  You can get "inside" of the arch by climbing up a few rocks that someone has stacked for easier access.  Trust me, you want to climb into the arch!  Like I said before this is an incredibly unique formation.  Click here for map.

There are two trail heads you can start this hike from.  I chose to start the trail at the Jordan Road Trailhead and my description will follow from that starting point.  Directions to this trailhead are at the end of this post, along with directions to the alternative starting point, Soldier Pass Trailhead. ( You can also click on the trailhead names to go to a google map of the location). Just be aware parking is limited, however there is more parking spots at the Jordan Road Trailhead than at  the Soldier Pass Trailhead. You will need to purchase a Redrock Pass to park at either parking lot.  Conveniently there is a Redrock Pass vending machine at the Jordan Road Trailhead which takes credit cards.  Click here for information on obtaining a Redrock Pass.

From the Jordan Road Trailhead you will start out on the Brin's Mesa Trail and hike this trail counter clockwise.  This trail begins to the right and behind the Trailhead Information Sign/Map.  A few hundred feet into your hike the Cibola Pass Trail will head to the left.  Stay on the main Brin's Mesa Trail.  About 1 mile in you will begin a steep climb to the top of Brin's Mesa.  It's nothing too steep or long, but in my case it did get my heart pumping.  At 1.4 miles you will come to the top of your climb.  You have reached Brin's Mesa and will notice a lot of dead trees.  A fire in 2006 swept through this area.

Continue on the trail for approximately .5 miles where you will come to a split in the trail.  Take the Solider Pass Trail to your left.  You will begin a descent down into the canyon below.  As you begin your descent look to your left along the canyon wall where you will see three alcoves.  The furthest on on the right is the Solider Pass Arch.  It does not look like an arch from this vantage point.

View across to the arches
Once you have reached the bottom the trail will wind through trees, providing some nice relief from the sun.  You want to keep your eyes out for the Soldier Pass Arch Trail around 3 mile that will go off to the left.  This side trail was not marked.  However, you will know you are close to the junction when you pass the Secret Mountain Wilderness sign.  Another hundred feet or so and the Arch Trail appears to the left.

The Arch Trial begins a steep ascent up the side of the canyon wall.  You will come to a large clear sandstone area.  Head across this and you will see the trail begin another steep climb.  Continue up the trail which will end right at the Soldier Pass Arch.  You can access the inside of the arch by walking up to the alcove and look to your right.  Some has stacked rocks to make the entry through the crack easier.  Climb up this crack and then check out what awaits you inside.

Inside the Arch
After you are done exploring the arch, then head back down the way you came.  When you come back to the Soldier Pass Trail Junction, head to your left and continue down the trail.  You will come to another junction in the trail.  Stay on the trail to the left.  The trail to the right turns into a jeep road and will take you to the Soldier Pass Trailhead.

Seven Sacred Pools
You will soon come to what is called the Seven Sacred Pools.  This is another open sandstone area where water has created levels of pools.  On my visit there was standing water in several pools and also plenty of bees, so be careful.  They left us alone though. 
Devil's Kitchen
Continue on the trail to another unique geological formation called Devil's Kitchen.  This is a massive sink hole, what it would have been to witness the collapse of this?

Once you pass Devils Kitchen you will come to another junction.  You want to take the Jordan Trail which heads to the left across another open sandstone area. 
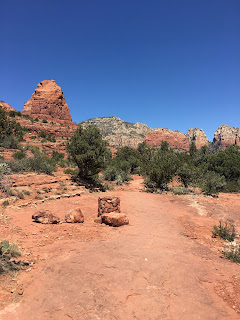
Jordan Trail
Follow the Jordan Trail for about .5 miles where you will come to your final junction.  Take the Cibola Pass Trail to the left.  This trail will head up and over the hill in front of you for .7 miles.   It is another steep climb, but not long.  When you reach the top you will quickly head back down and should be able to see the cars parked in the trailhead below.

This is a great loop hike that packs a lot of variety in its short 6 miles.

Length: 6 miles loop
Difficulty: Moderate
Traffic: Heavy use
Fee: $5.00
Hike Time: 3-4 hours
Season: Fall through Spring 

Directions: 

To Jordan Trailhead:
From the Sedona Y (Junction 89A and 179) go north east, towards Uptown Sedona, for 0.3 miles. Turn left into Jordan Rd and follow Jordan Rd for 0.8 miles to a T intersection with Park Ridge Drive. Turn left on Park Ridge Drive to the end of the pavement and continue on a fairly bumpy dirt road (but passable for passenger cars) for about 0.7 miles to parking and trailhead.

To Soldiers Pass Trailhead:
An alternate trailhead about 1.2 hiking miles away from the Jordan Road Trailhead. From the Sedona Y (Junction 89A and 179) go west towards West Sedona and Cottonwood for 1.2 miles to the first light and turn right into Soldiers Pass Road. Follow the winding Soldiers Pass Road north for 1.5 miles to Rim Shadows Drive. There is a small brown trail sign there. Turn right and go on for less than 0.2 miles. The names of the roads are screwy around here, but there are little brown signs steering you to the parking area. The parking is on the left, up a gated drive (only open from 8am to 6pm!) with a limited number of parking spots.

From PHX (I-10 & AZ-51) 123 mi, 2 hours 16 mins
From TUC (Jct 1-10 & Grant) 228 mi, 3 hours 56 mins
From FLG (Jct I-17 & I-40) 29.3 mi, 41 min


Saturday, June 28, 2014

Browns Peak- Four Peaks

Browns Peak is the furthest peak to the left
I finally made it to the top of  Browns Peak , the highest peak within the Four Peaks Wilderness.  This hike has been on my hike list for some time.  I would encourage anyone who loves to hike to put this on your list.  The scramble up the chute and the view from on top of the peak is worth the effort. 

Four Peaks is the name of a north-south ridge on the Eastern skyline of the Phoenix Metro area.  The tallest peak, Browns Peak  at 7,657 feet  is the highest elevation in Maricopa County.  The other three summits are only slightly lower in elevation. 

Plan on an entire day for this excursion.  The drive from the east valley to the trail head is about two hours.  However, the drive is part of the fun.  The trail head begins at Lone Pine Saddle and can be reached by two different routes, both dirt road.  A four wheel drive is not necessary unless there has been recent rain; however, a high clearance vehichle with good tires is recommened.  A description of both driving routes is at the end of this post. 

The road ends at the Lone Pine Saddle trailhead and there is ample place to park.  You find yourself high above the desert floor in pine trees and manzanita brush.  The trail starts at the eastern end of the parking lot.  There are two trails that start at this location, Four Peaks Trail to your left and the   the Browns Trail #133 which goes directly straight ahead of you.  Take the Browns Trail.  This will head directly east up the hill.  The trail switchbacks up a gradual incline through pine trees.  You will soon come to a uniquie rock formation, called Woodstock. As it resembles the character from Snoopy.

Continue on the trail and soon you will pass a fork in the trail on your left.  Keep heading straight on the trail you came in on.  Shortly you will come a saddle.  The trail forks again at this location.  Browns Peak is directly to your left.  Follow the trail towards the mountain peak.  The trail route takes you up the chute.  See the picture for reference.
The trail is well worn and marked with a few cairns.  You will come to a spot that you need to scramble up and between a boulder against a large cliff face.  Once you get past this you will be ready to enter the scree chute.  Head straight up the chute.  The rocks are loose, so watch your footing!  Getting a twisted ankle in this location would make for a very unpleasant hike out. Also, beware of rocks falling from hikers above you.  About 3/4's up the chute you will come to a wall.  You can easily pass this wall by heading to your left to go up and around or just scramble up the wall if you feel comfortable.  Once you pass this obstacle you will be near the top.  Continue up until you are on top and recieve the grand 360 degree view around you.  To the north is Roosevelt Lake.  To the southeast are the other three peaks which make up the Four Peaks Wilderness.  You can see Apache Lake, Canyon Lake and Saguaro Lake laid out below the Supersition ridge far below you.

The April day we were on top there were thousands of lady bugs on the peak.  It was amazing.   Head back down the way you came, be careful heading down the loose scree on the chute. 
Do not attempt this hike during poor weather.  The chute is steep and if it is wet will become increasingly dangerous.  Do not attempt during lightning storms, for obvious reasons. 

I would rate this hike easy to the saddle and then the scramble up the chute as moderate to difficult depending on your hiking skills.  Remember the elevation change is substantial from the Phoenix Valley so you will find yourself out of breath easily.

Length: 5 mile (out and back)
Elevation Gain:  1,933 feet
Accumlated Gain: 2,064 feet
Difficulty: Moderate to Difficult, depending on hiking level.  Not recommened for novice hikers or those afraid of heights.
Traffic:  Light
Fee:  No fee
Hike Time: 2- 3 hours
Drive Time: 4-5 hours total to and from Mesa.
Season:  Spring through Fall

Directions:

To Lone Pine Trailhead-

Western driving route: FR 143- High Clearance Vehicle

1. Take 87 North (Country Club)
2. Turn right at the Four Peaks Wilderness/Recreation Area. After mile marker 203
3. Follow for 19 miles
4. Continue on the main road ((a long way, High clearance vehicles are recommended, 4 wheel drive is not necessary unless it's rained)) until you come to an awkwardly shaped "T" crossing a cattle guard, at which time take a sharp right. You almost feel as if you are doubling back.
5. Drive 1 mile to Lone Pine Trail Head.

Eastern driving route: El Oso Road- Passenger Car

1. Take 87 North (Country Club)
2. Turn right on Hwy 188
3.  8 miles south of Punkin Center turn right on El Oso Road
4.  Follow well graded, though steep, dirt road 11 miles
5.  Turn Left at sign to Lone Pine Saddle
6.  Drive 1 mile to Lone Pine Trail Head.


Friday, June 20, 2014

Picacho Peak, Hunter Trail

Put this hike on your list and bring gloves to do it!  It is a great desert hike to do in the winter months.  Picacacho Peak is located right off I-10 halfway between Casa Grande and Tucson.  It is worth the drive to do this fun peak.  The hike rewards you with 360 degree views of the desert floor from high atop the 3,374 feet summitt. For the trivia minded, Picacho was actually the location of a very small Civil War Battle.

Watch a short clip of the cable section of the hike:


The trail is located in Picacho Peak State Park and requires an entrance fee of $7.00/vehicle.
Click for park map.

The Hunter Trail is an out and back hike and totals 3 miles.  The hike begins to climb immediately and switchbacks up the north side of the mountain for the first section to the saddle.  Once you have gained the saddle at 2,960 feet take a moment to enjoy the view below. This where the trail gets fun! The trail descends down the back side (south side) of the saddle down a steep rock slope. Cables have been installed to assist the hiker, hence the benefit of having gloves.  The trail  then turns toward the east and around the backside of the mountain.  You will soon approach a trail coming in from your right side, which is the Sunset Vista Trail.  Keep heading straight on the Hunter Trail.  Another section of cables soon appears.  Toward the end of the trail you will reach the steepest section which again cables have been intstalled to assist and near the summit a short bridge has been erected to help the hiker across a slope.  Once you have finished the last section of cables follow the trail up and to your right which will take you to the true summit. 

Upon reaching the summit you will have gained an accumalted 1,888 feet.  I enjoyed sitting on top for a while and watching the ground squirrles scrounge for dropped food from other hikers.  There were also birds swooping over the peak.  It was an impressive sight to watch. 

Return the way you came.  Remember to bring plenty of water on this trail and shoes with good support and traction. 

Length: 3 miles (out and back)
Overall elevation gain: 1,888 feet
Difficulty: Moderate/difficult (depending on fitness level and fear of heights)
Fee:  $7.00/car
Water and restrooms:  Yes
Kid Friendly:  Steep sections with drop off's.  Use your best judgement. 
Hike Time:  2 hours
Directions: Located between Tucson and Casa Grande on I-10. Take Exit 219 and follow signs to Park Entrance.  Click for driving map


Sunday, February 9, 2014

Boulder Canyon Loop

Trailhead
This is a fantastic hike!!!  It has plenty of expansive views, tall canyon walls, pools of water and includes a small section of bushwhacking and boulder navigation to make it a little more fun and exciting.  The trail starts at the Canyon Lake trail head in the Superstition Mountains and is located directly across the street from the parking lot of the Canyon Lake Marina.  Park in the parking area of Canyon Lake Marina closest to the road on the south end of the lot.  It is signed for trail head parking only.  Walk across the road and start hiking up Trail #103, Boulder Canyon Trail. 

The trail starts out on a steady climb for the first mile, once you top out on the ridge make sure you take a look behind you at Canyon Lake below.  You get an amazing view of the beautiful desert lake.  Continue on the trail and you will soon come to an expansive view into the Superstition Wilderness and of Weavers Needle and Battleship Mountain in the distance.  The trail winds its away along the ridge and then along the hill side.  Around mile 2 you will begin a steady descent into LaBarge Canyon which you can see below on your right. At about mile 3 you will reach LaBarge Creek.  The main trail continues across the creek, but to complete this described hike you will leave the main trail and turn right (Northwest) and follow the creek bed as it winds back towards Canyon Lake.  You will stay in the creek bed for the next 1.5 miles or thereabouts. Warning, this section of the hike may be impassible after heavy rains.


This section of the hike is where it gets fun.  The canyon walls begin to get higher and the canyon begins to narrow as you make your way down the creek bed.  At about mile 3.5 (sorry I don't have exact location) you will come to a section where the canyon floor is overgrown in brush. You will need to just bush whack your way through this, there is no wrong way to go, just keep heading down the creek bed.  At this spot we started noticing small pools of water as well.  After you break through the tangeled mess you will come to a bend in the canyon and also a fork.  Boulder Canyon is the canyon you will see coming in off of your left.
The canyon walls here are quite impressive.  Keep your eyes out for big horn sheep while in this canyon as well.  Soon after Boulder Canyon comes in you will come to a section with a few large boulders and a large pool of water.  To pass this spot keep to the right side of the canyon.  There are a few options on that side to get around the pool of water.

Exit Location
Continue down the canyon and it will open wide again, with several pools along the way.  You will come to one other nice sections where the canyon narrows for about 100 yards and the floor is littered with colorful rocks.  After you pass this spot the canyon will again open wide.  Continue down.  At about mile 5.0 you will come to left bend in the canyon and a large pool of water at the end.  This is actually the inlet of Canyon Lake.  Directly in front of you as the canyon bends to your left is a slopping rock hill.  This is your exit point.  You will also see a few cairns dotting their way up the side of the hill.  Once on top, you will see the inlet of Canyon Lake below.  Follow the trail as it continues up the hill.  There are quite a few trails that meander through here, but just keep left turns and you will link back into the main trail that you came in on.

Follow this link for the mapped route of the trail. 

In all this trail is about 5.5 miles, depending on the route you take through the canyon floor.  I would rate this moderate.  It is a fun trail that gives you a taste of everything in a short 5 miles. 

Length: 5.5 miles
Overall Elevation Accumulation: 2, 103 feet
Difficulty:  Moderate
Traffic:  Moderate on Trail #103, Light in the canyon
Fee:  No fee!
Waters and Restrooms at Canyon Lake Marina


Kid Friendly
Hike Time:  3 hours
Directions From Phoenix:  East on US 60; exit north on Idaho Road; turn right on Hwy 88 (The Apache Trail) Drive 15 miles to the Canyon Lake Marina.  The Marina is right after the second bridge crossing.  Turn left into the marina and park on south side of lot closest to the highway. 

View back up the canyon from the exit point

Sunday, January 26, 2014

Pinnacle Peak - North Scottsdale

Pinnacle Peak is located in North Scottsdale and sharply rises from the desert floor.  The trail does not actually go to the top of Pinnacle Peak, but skirts below and around it.  I imagine the view from the top, which is accessible via rock climbing routes would be fantastic.  This trail is an out and back trail and in all is 3.5 miles in length.  The downfall to this trail is that it is located in a populated area and is very busy, especially on the weekends.  If you are looking for solitude, you won't find it here.  However, you will find a good cardio workout and nice views of the valley.

This a very well marked trail and is maintained by the City of Scottsdale.  You are not allowed to wander off the main trail.  There are a few rock climbing routes in the area and are accessible via well marked spur trails.   The trail begins to climb very near the start of the trail head and levels out for a bit at about the 1/2 mile mark.
At this point if you look to your right you will see a large prominent boulder which is called Y-Crack Boulder, as the large crack up the face of the boulder looks like it's namesake.  There are a few rock climbing routes on the boulder as well.  The trail soon turns south and begins climbing again.  at .65 miles you will come to a good spot to take a drink and check out the view at the Grandview Lookout.  Continue up the trail to its highest point marked by a sign at 2,625 feet.  The crags of Pinnacle Peak are directly above and in front of you.
The trail begins to descend into a small saddle area with another nice look out spot.  You will then begin a small asscent up the side of the adjacent hill and at about 1.25 miles begin to descend down the western side of the hill. 
The trail offically ends at the bottom of this hill and is marked by a sign.  You can continue .3 miles further down the trail on the Jomax Trail. However, I stopped at the boundary and made my way back.  The return up the hill heading this direction gives you a bit more of a workout then your hike in..
This is a good hike if you are looking for something close to the valley, something that is not difficult, but gives you a work out.  However, like I mentioned do not expect to be alone.  It is very busy. 

Length: 3.5 miles out and back
Elevation gain: 550 feet
Difficulty: Easy (however good cardio workout)
Traffic: Busy
Fee:  No fee
Hours: Check Scottsdale Park website for hours, as they change with the seasons
Water and Restrooms at trailhead
Kid Friendly
Hiking time: 1.5 hours


Monday, October 14, 2013

Garden Valley Loop/Hackberry Springs

This is a great moderate loop hike along the northern side of the Superstition Mountains.  There are a few hills on this hike, but if you follow the route in the direction described, you will travel down the larger hills, rather than up. The trail is located off of First Water Road, which is a dirt road just past the entrance into Lost Dutchman State Park.  Detailed directions to the trailhead are posted at the end.  On Forest Road 78 turn right and travel approximately two miles until you see a large parking area with a restroom on your left.  Park at this spot.  There is no fee required.  Walk up the dirt road, heading east about 1/4 of a mile.  You will soon see a rough road heading off to your left and a gate.  This is the start of the trail.  Follow the road up the ridge and soon you will descend down a rocky hill.  Below you can see an old ranch, with a few buildings remaining and an old windmill.  When you reach this follow the path past the windmill towards the large rock outcropping straight ahead and to the left of you.  The trail will descend down into the creek bed.  You will shortly come across Hackberry Springs.  I hiked this in October and there was water trickling up out of the spring.  The trail soon enters a narrow canyon section.  This spot is a fun little spot.  Continue to follow the canyon down.  We saw a lot of small toads in the area and also a large tarantuala.
The trail will soon come out of the narrow section and turn to your right.  Continue to follow as the trail skirts along the creek bed.  At about mile 2 the trail will turn to your right and head up the hill. 
You will gradually climb up until you are on top of Hackberry Mesa.  Once on top continue to the follow the trail as it turns south.  You will soon come to a large open area known as Garden Valley.  Follow across the valley to a signed junction with the Black Mesa Trail #241.  Turn right at the junction and head west.  You will drop off another hill down into a ravine, with another short climb to follow.  You are about 1.5 miles from your car at this point.  Continue as you cross over another stream bed.  You will see a small trail head off to your right this will take you back to the old ranch area.  Keep on the main trail heading west and you will climb up another short hill.  At the top of the hill is the parking area for the Second Water Trail Head.  Follow the road about 1/2 mile to where you parked your car.  The loop described is 5.3 miles.  This is a great moderate hike.  It has a few hills but nothing strenuous.  The best part of the hike is short canyon section at the beginning.


Click below  for a map of the described route:

Garden Valley Loop/Hackberry Spring


EveryTrail - Find the best Hiking near Mesa, Arizona

Length: 5.3 miles
Elevation Gain:  unknown, small hills
Difficulty:  Easy to Moderate
Season:  Fall through Spring
Time:  2 hours
Fee:  No fee
Kids: Kid friendly
Directions: From Apache Junction trail NorthEast on SR88 (The Apache Trail) for 5.3 miles.  Just past Lost Dutchmen State Park you will turn right on FR78 (dirt road and passenger vehicle friendly). Travel 2 miles to the large parking area on your left.  If you travel past this you will soon come to a dead end and the Second Water Parking Area.  (This is the spot where you will come up out of your hike). 

Sunday, October 13, 2013

Red Rock Crossing/Crescent Moon Picnic Area - Sedona

Chances are if you have seen a photo of Sedona, then you have viewed this photo from Red Rock Crossing of Oak Creek flowing below Cathedral Rock. 
While this spot is not a hiking location, it is a great destination and one not to miss.  Red Rock Crossing is located 7 miles southwest of Sedona, and unfortunately you will not be alone when you visit.  In fact while we were there several tour buses unloaded to enjoy the view. However, it is still worth your time to visit.  Try to go early or during the week.  Red Rock Crossing is operated by a private concessionaire on Federal Land. The entrance fee is $9.00 a car (up to five in a car).  Yes, it is a tad pricey! You may visit from 9:00 a.m. until dark. There are several picnic tables and a nice path that will take you to various parts of the creek.  Take your time to explore the path network and play in the water.

 One spot not to miss is called Buddah Bay, this is a location that some people believe is an energy vortex.  Regardless of your beliefs people have built up small rock monuments, like cairns along the path.  It is actually quite the sight and fun to build a few with your kids.
 Here is a link to the official Forest Service page.

Directions: Drive west from Sedona on US 89A. Just outside town, turn south on FR 216 (Upper Red Rock Loop Road). Drive about 1.5 miles and follow the signs to Red Rock Crossing.
Fee: $9.00